How to add your custom bootsplash to SeaBIOS
2018-09-27
WARNING! Proceed at your own risk! Be sure to have a Raspberry Pi and a Pomona clip handy in case you mess up.
Saving the image
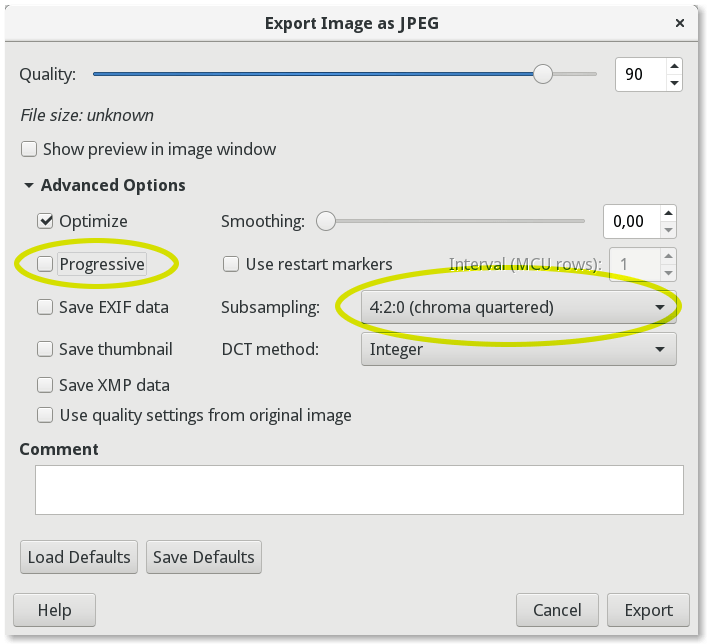
Open the desired image and export it as JPG, in the saving options change "Subsampling" to 4:2:0 and uncheck "Progressive":
The output image must be 1024px wide and 768px tall. Don't forget that the X230's screen is 16:9, so the it will be additionally shrinked.
Making a dump of up your current ROM
Dump your current ROM using flashrom (don't forget to boot with iomem=relaxed kernel option):
# flashrom -p internal -r file.rom
Additionally, if you're on X220, you might have to force flashrom (as mentioned here):
# flashrom -p internal:laptop=force_I_want_a_brick -r file.rom
Adding the bootsplash
Then, add the bootsplash image using cbfstool from coreboot-utils:
# cbfstool file.rom add -f <name of your bootsplash file> -n bootsplash.jpg -t raw
For X230 users:
$ cat >layout.txt <<EOL
0x00000000:0x007fffff ifdmegbe
0x00800000:0x00bfffff bios
EOL
Flashing the ROM
X230:
# flashrom -p internal --layout layout.txt --image bios -w file.rom

X220:
# flashrom -p internal:laptop=force_I_want_a_brick --image bios -w file.rom
Have fun with your new bootsplash!