Removing the Wi-Fi whitelist on Haswell Thinkpads (T440p, W540, T540, etc.)
2020-06-17
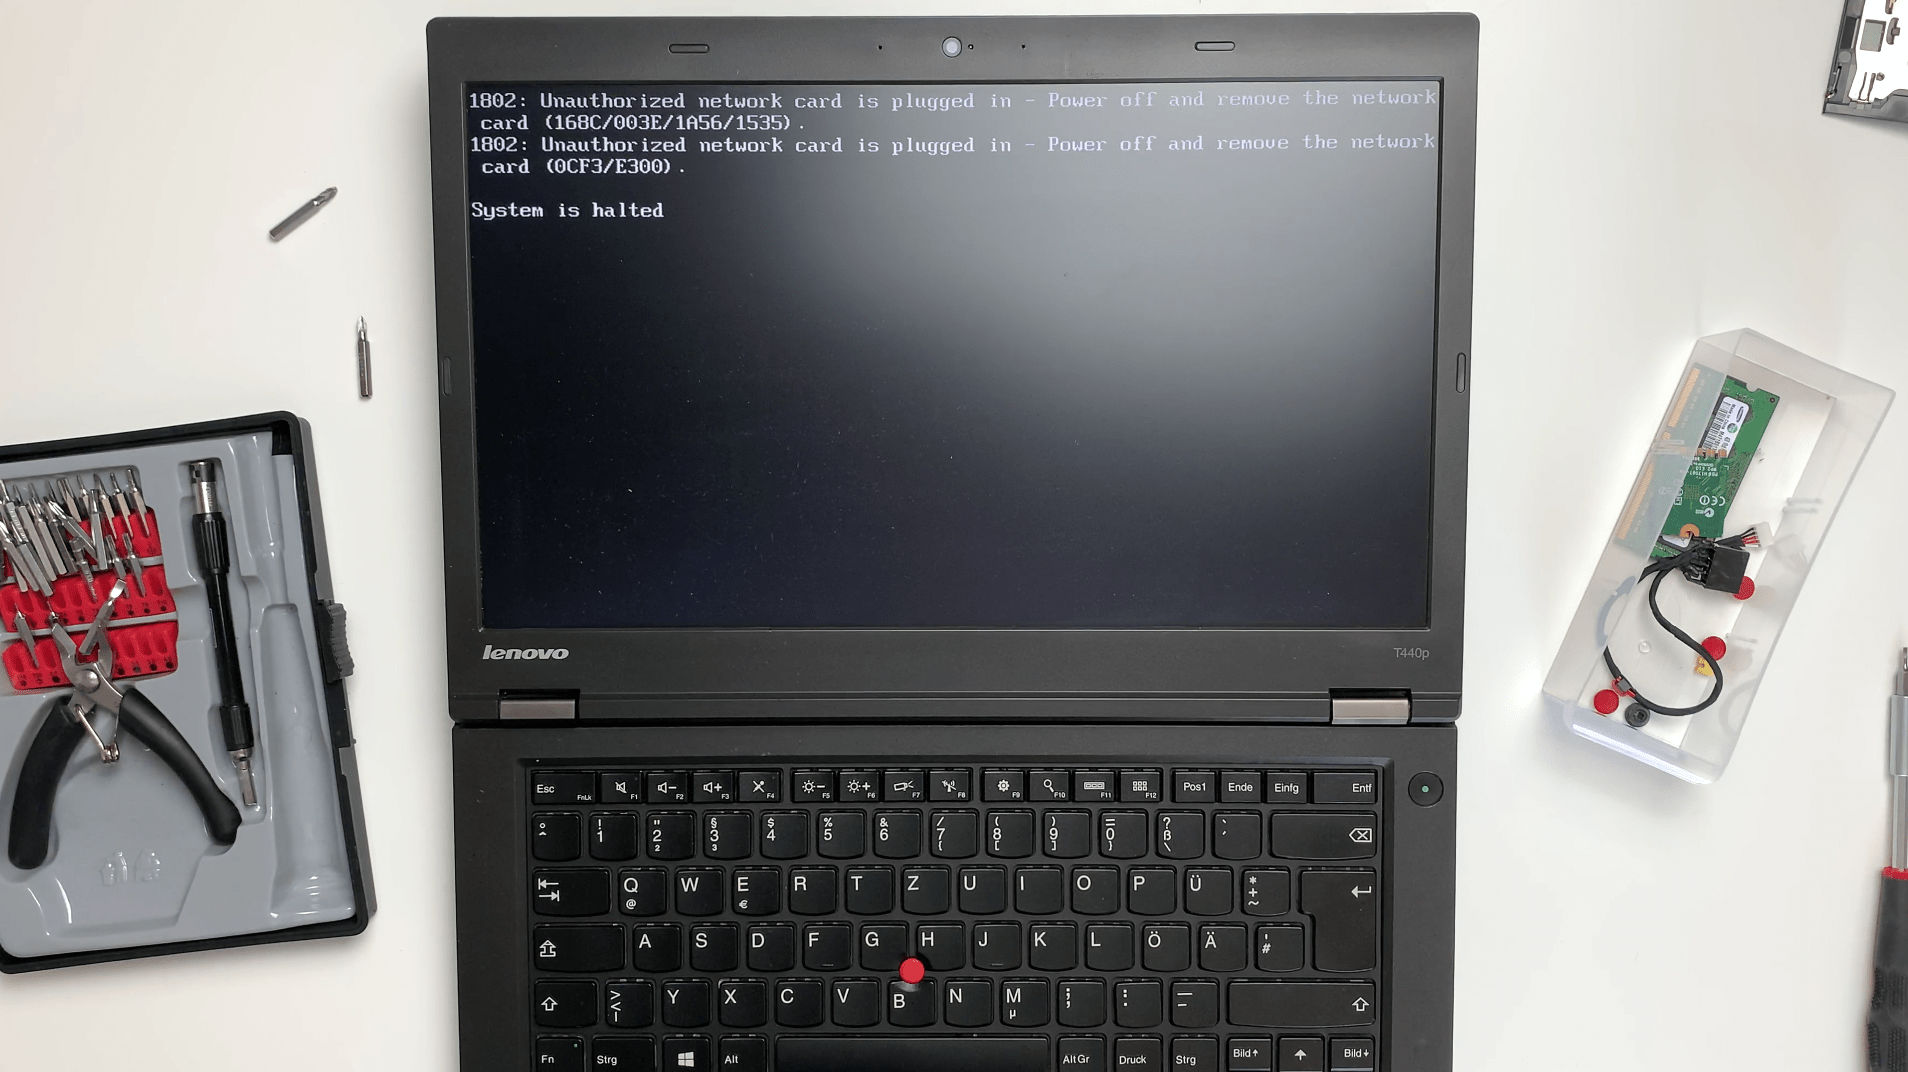
"Wi-Fi whitelist" functionality has been introduced by Lenovo in 2012 to keep users from replacing Wifi cards on their Thinkpad laptops. If you try to install a card that wasn't approved by Lenovo, your laptop will simply refuse to boot
Disclaimer
- This process is quite involved and requires at least a basic knowledge of Google and a steady hand. I provide zero warranty in case something goes wrong. This tutorial is fairly safe if you follow it carefully, but I'm not responsible for your laptop refusing to boot, taking fire, or shrinking in size.
- I'll be working on a Thinkpad T440p with BIOS version 2.52. I do not know whether it's going to work on other BIOS versions or any other Haswell Thinkpads since I only have T440p, but it's been reported to work on W540 and T540. The only way to find out is to try, and if something goes wrong you can always re-flash the original BIOS file.
- This process does not remove the BIOS or Supervisor password
Gathering supplies
Apart from the laptop itself, you will also need:
- a second laptop or desktop PC
- a CH341a external programmer with an 8-pin clip, they're usually sold together on websites like eBay, Amazon or Aliexpress for about $10.
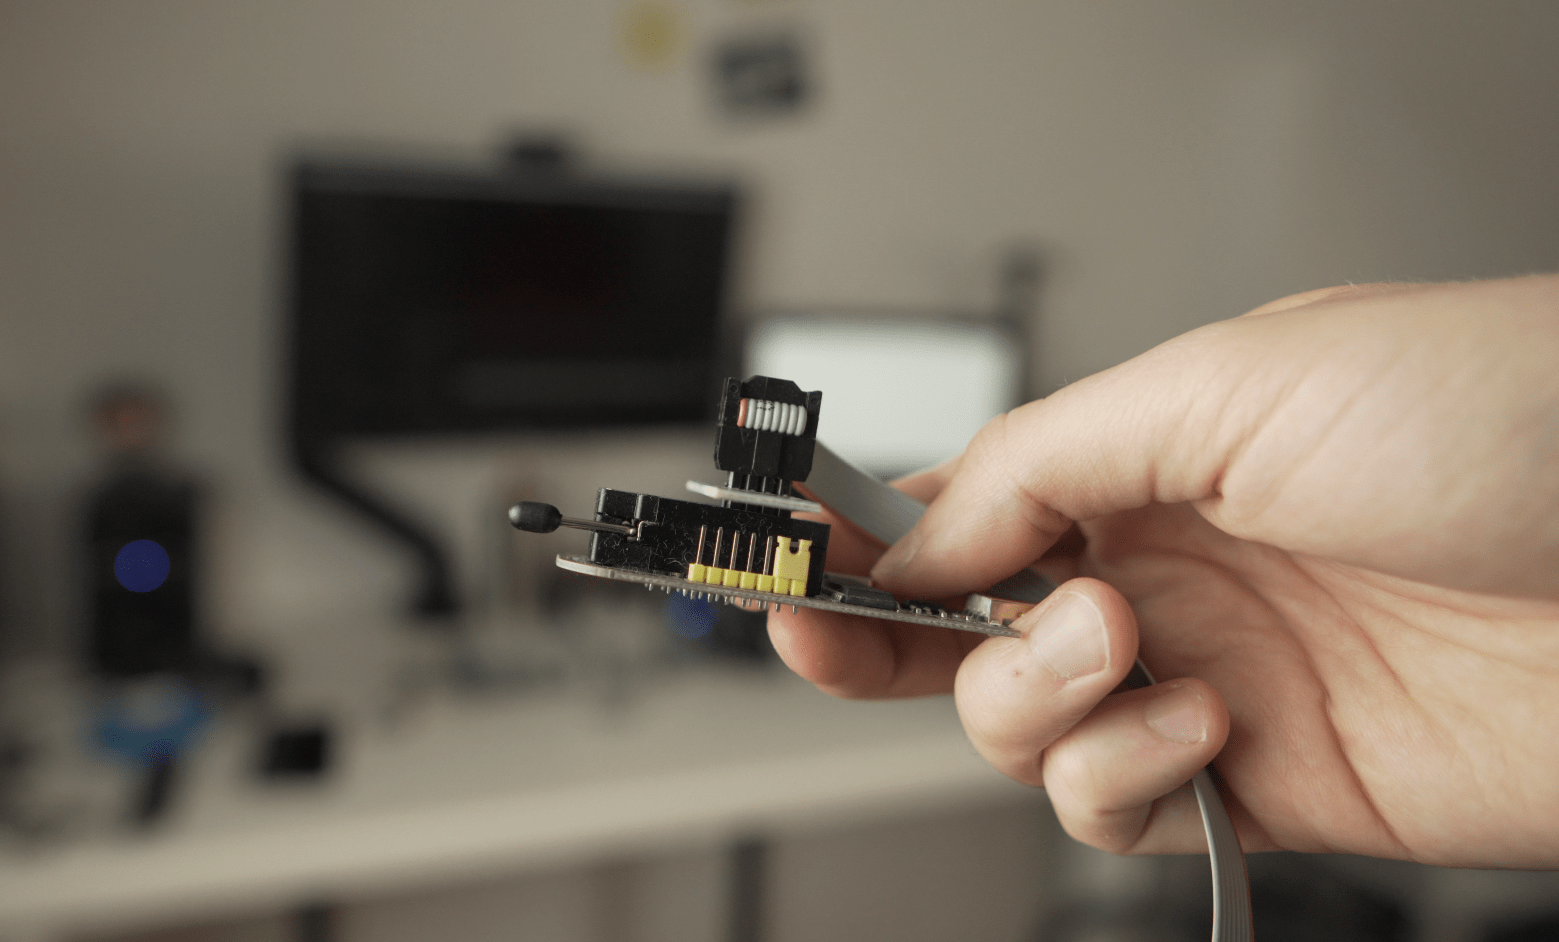
Assembling the programmer
Before using the programmer you also need to assemble it. Align the red wire on the clip with number "1" on the adapter, raise the lever on the programmer and plug the clip in the programmer as shown. Put down the lever.

Installing software
First, we need to install three things on our second computer: flashrom, UEFIPatch and thinkpad-uefi-sign. You'll also need to download the text file with patches.
On Linux you can simply install flashrom from your distro's repositories. On Ubuntu the command is sudo apt install flashrom
If you're on Mac you'll have to install the Homebrew package manager. After that you can install flashrom by simply typing brew install flashrom
On Windows, using flashrom is somewhat complicated since you'll need a special driver that can't be installed on 64-bit versions of Windows without some tinkering. You can find unofficial versions of flashrom with the USB drivers already included on the Internet, but use them at your own risk. The best option would be to follow this tutorial from an Ubuntu LiveCD.
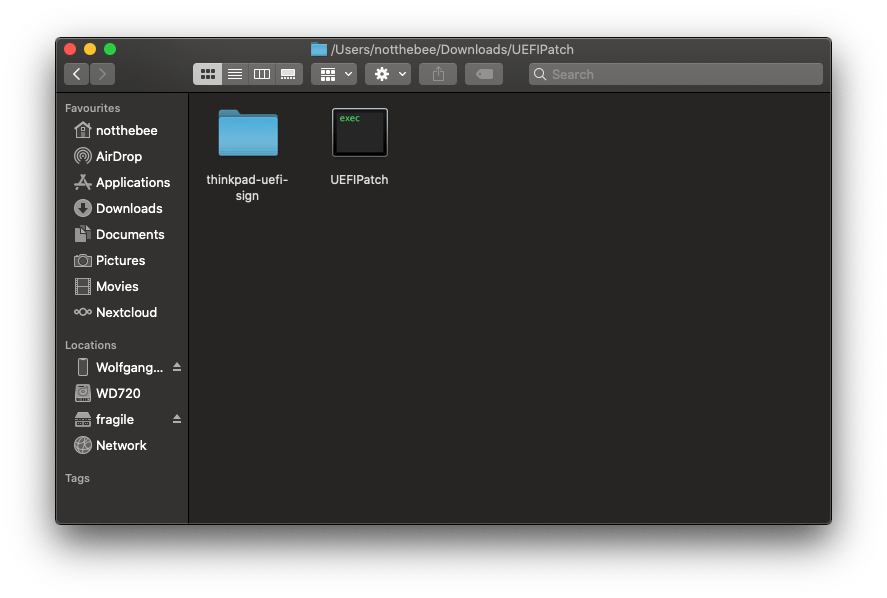
Installing UEFIPatch is easy: simply download the right version for your operating system from the Github and unpack it. Remove both text files from the folder to avoid any confusion.
After that, clone the thinkpad-uefi-sign Github repository or simply download the ZIP and unpack it into the same folder that you used for UEFIPatch.
Preparing the patches
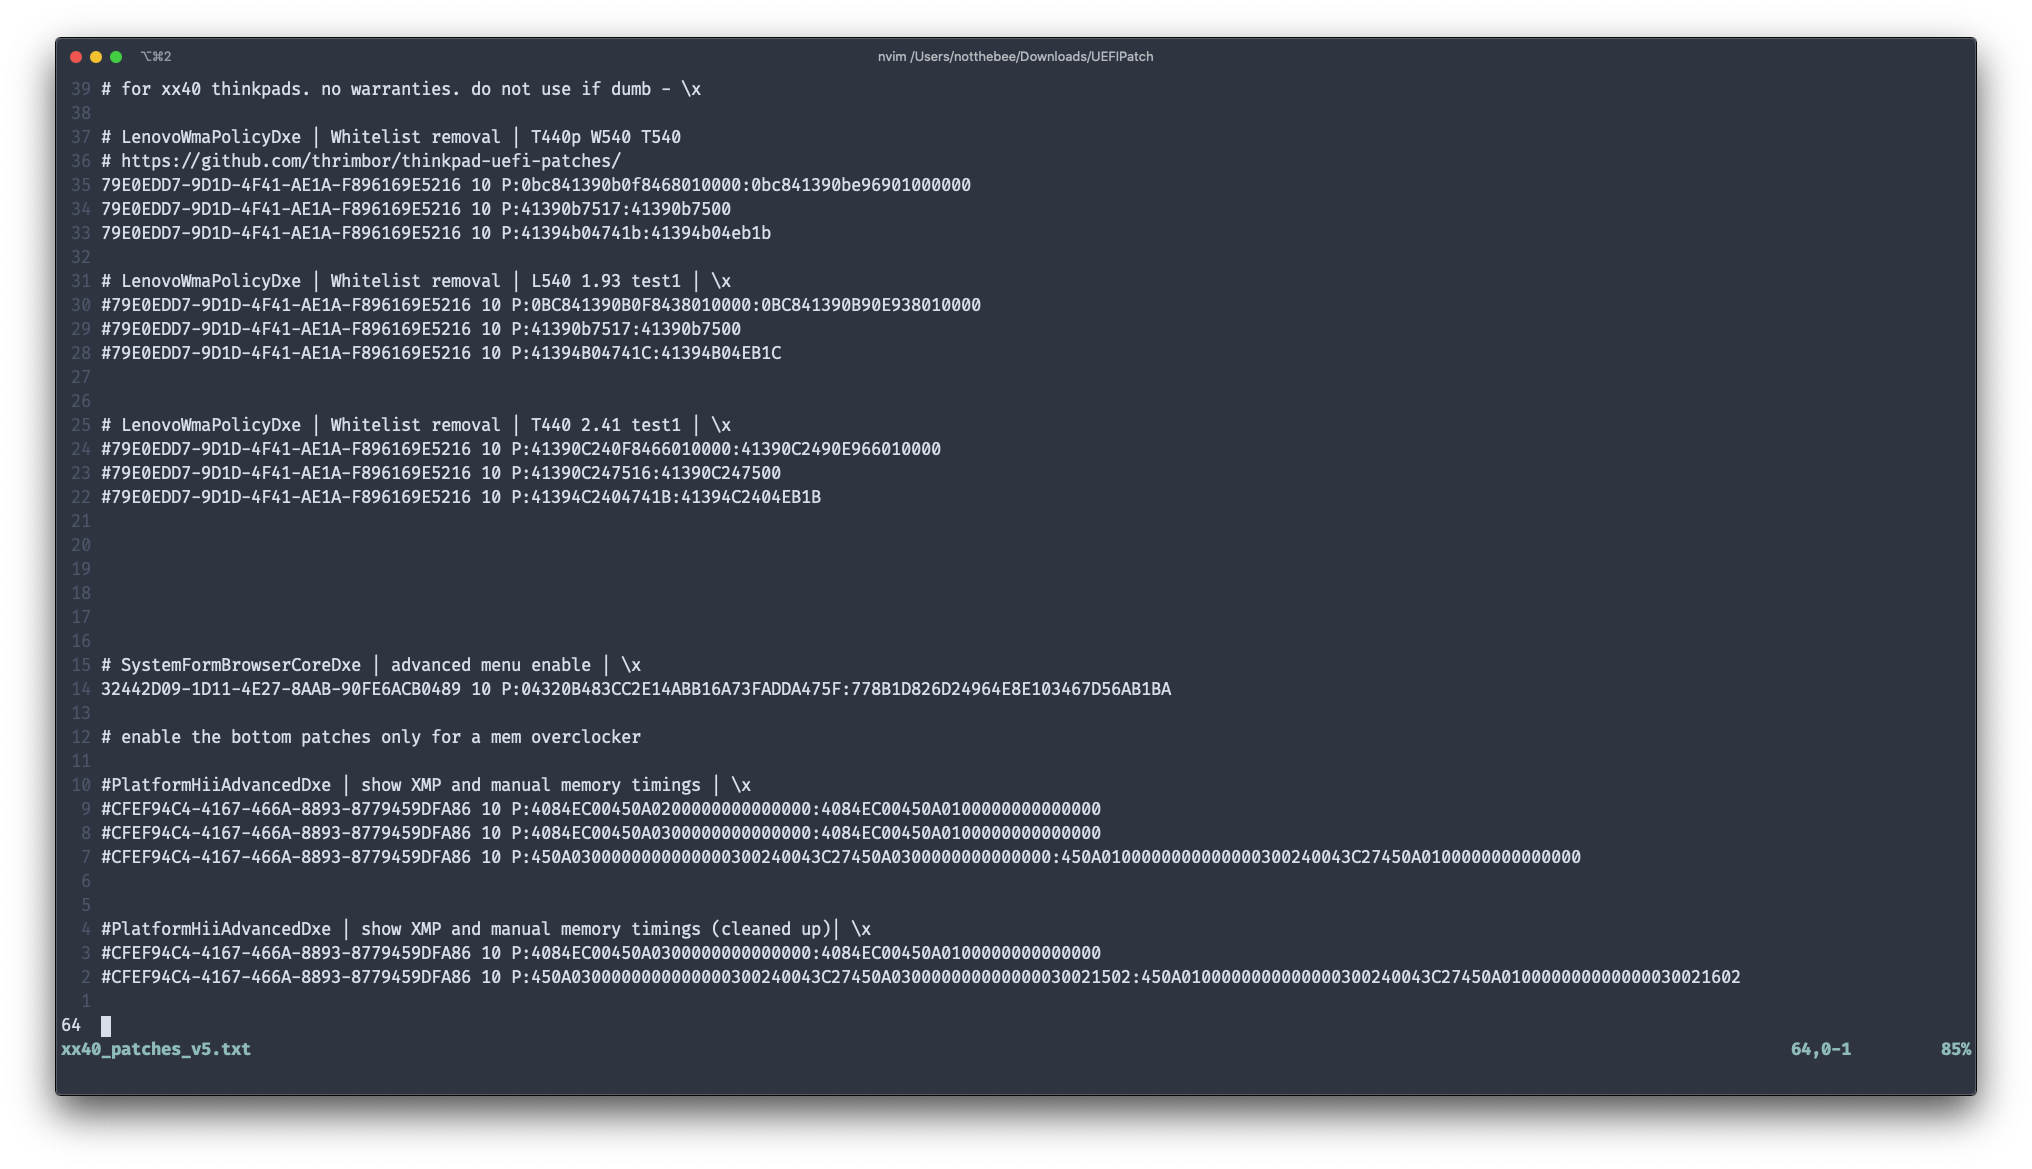
Download the text file with patches from the video description, move it to the UEFIPatch folder and open it with your favorite text editor. Here we're going to put a hash symbol in front of every patch that we don't want to be applied. The two bottom patches that unlock advanced memory settings are already commented out, and since I'll be doing it on a T440p, I'll also comment out the patches for T440 and L540. The file also contains a patch that unlocks the hidden advanced settings in BIOS, but if you don't want that for some reason, put a hash symbol in front of the line. Save the file and quit.
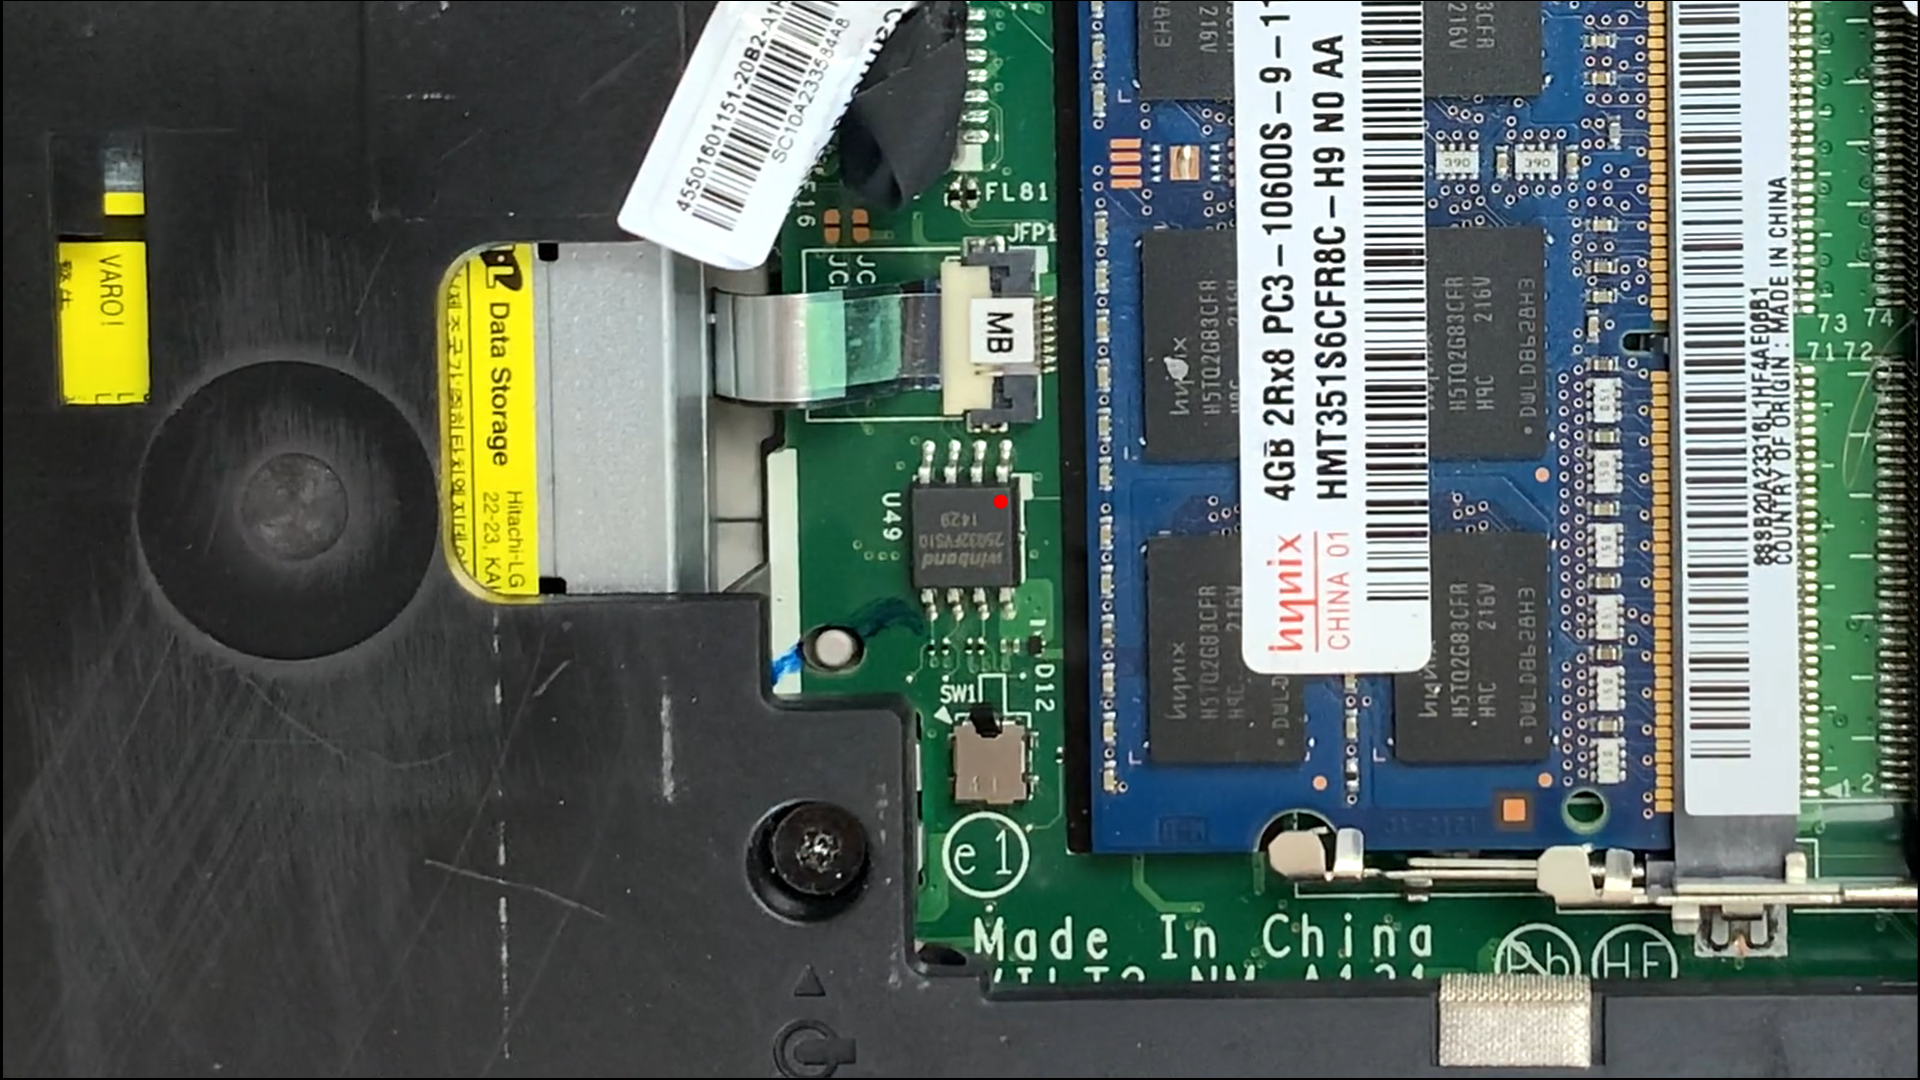
Dumping the BIOS
Turn your laptop upside down, remove the battery and take off the base cover. Take a good look at the motherboard and eventually you'll see a BIOS chip. If you're doing it on a different laptop, your BIOS chip might be at a different location and you might need to take the laptop apart completely to access it.
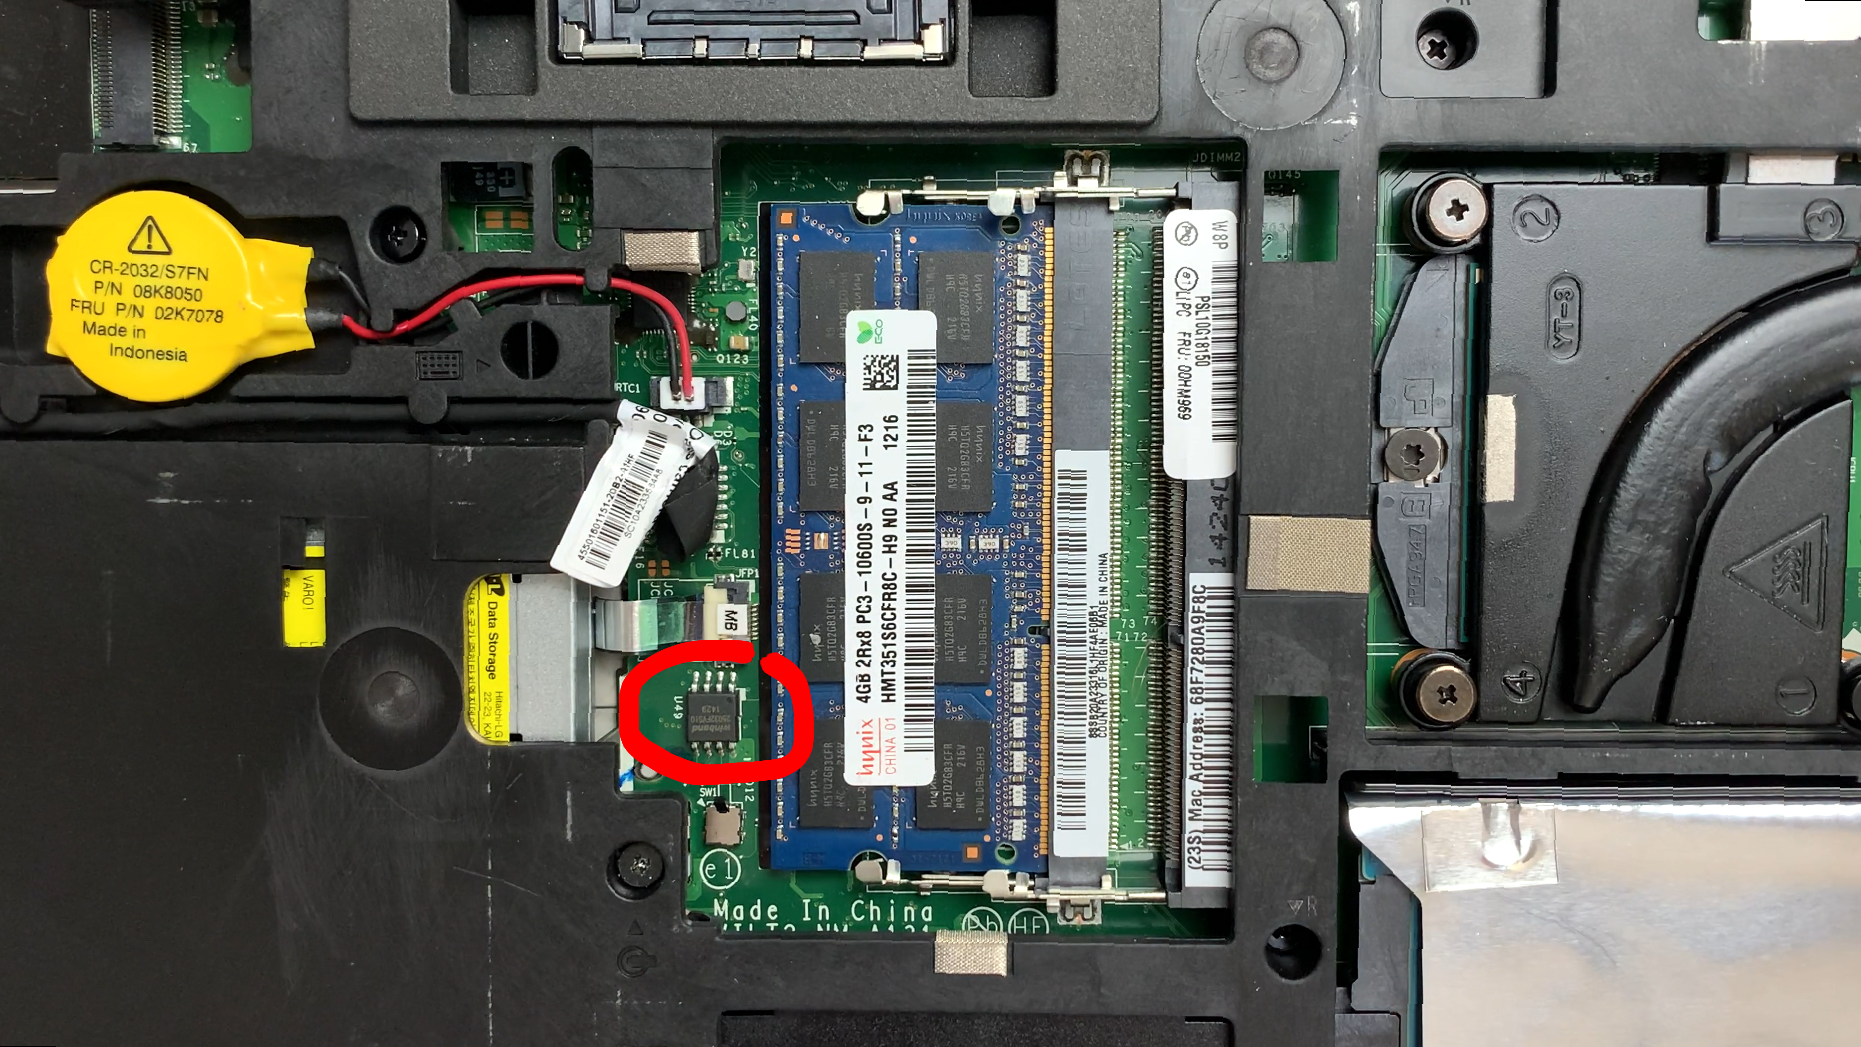
Next, align the dimple on the top of the chip and the red wire on your programmer clip and put a clip on the chip. Don't plug the USB programmer into your second laptop yet and double check that your battery is removed. Be careful, anchor the clip on one side and then close it in on the other side. Look at it from all sides and make sure the clip sits tightly on the chip.
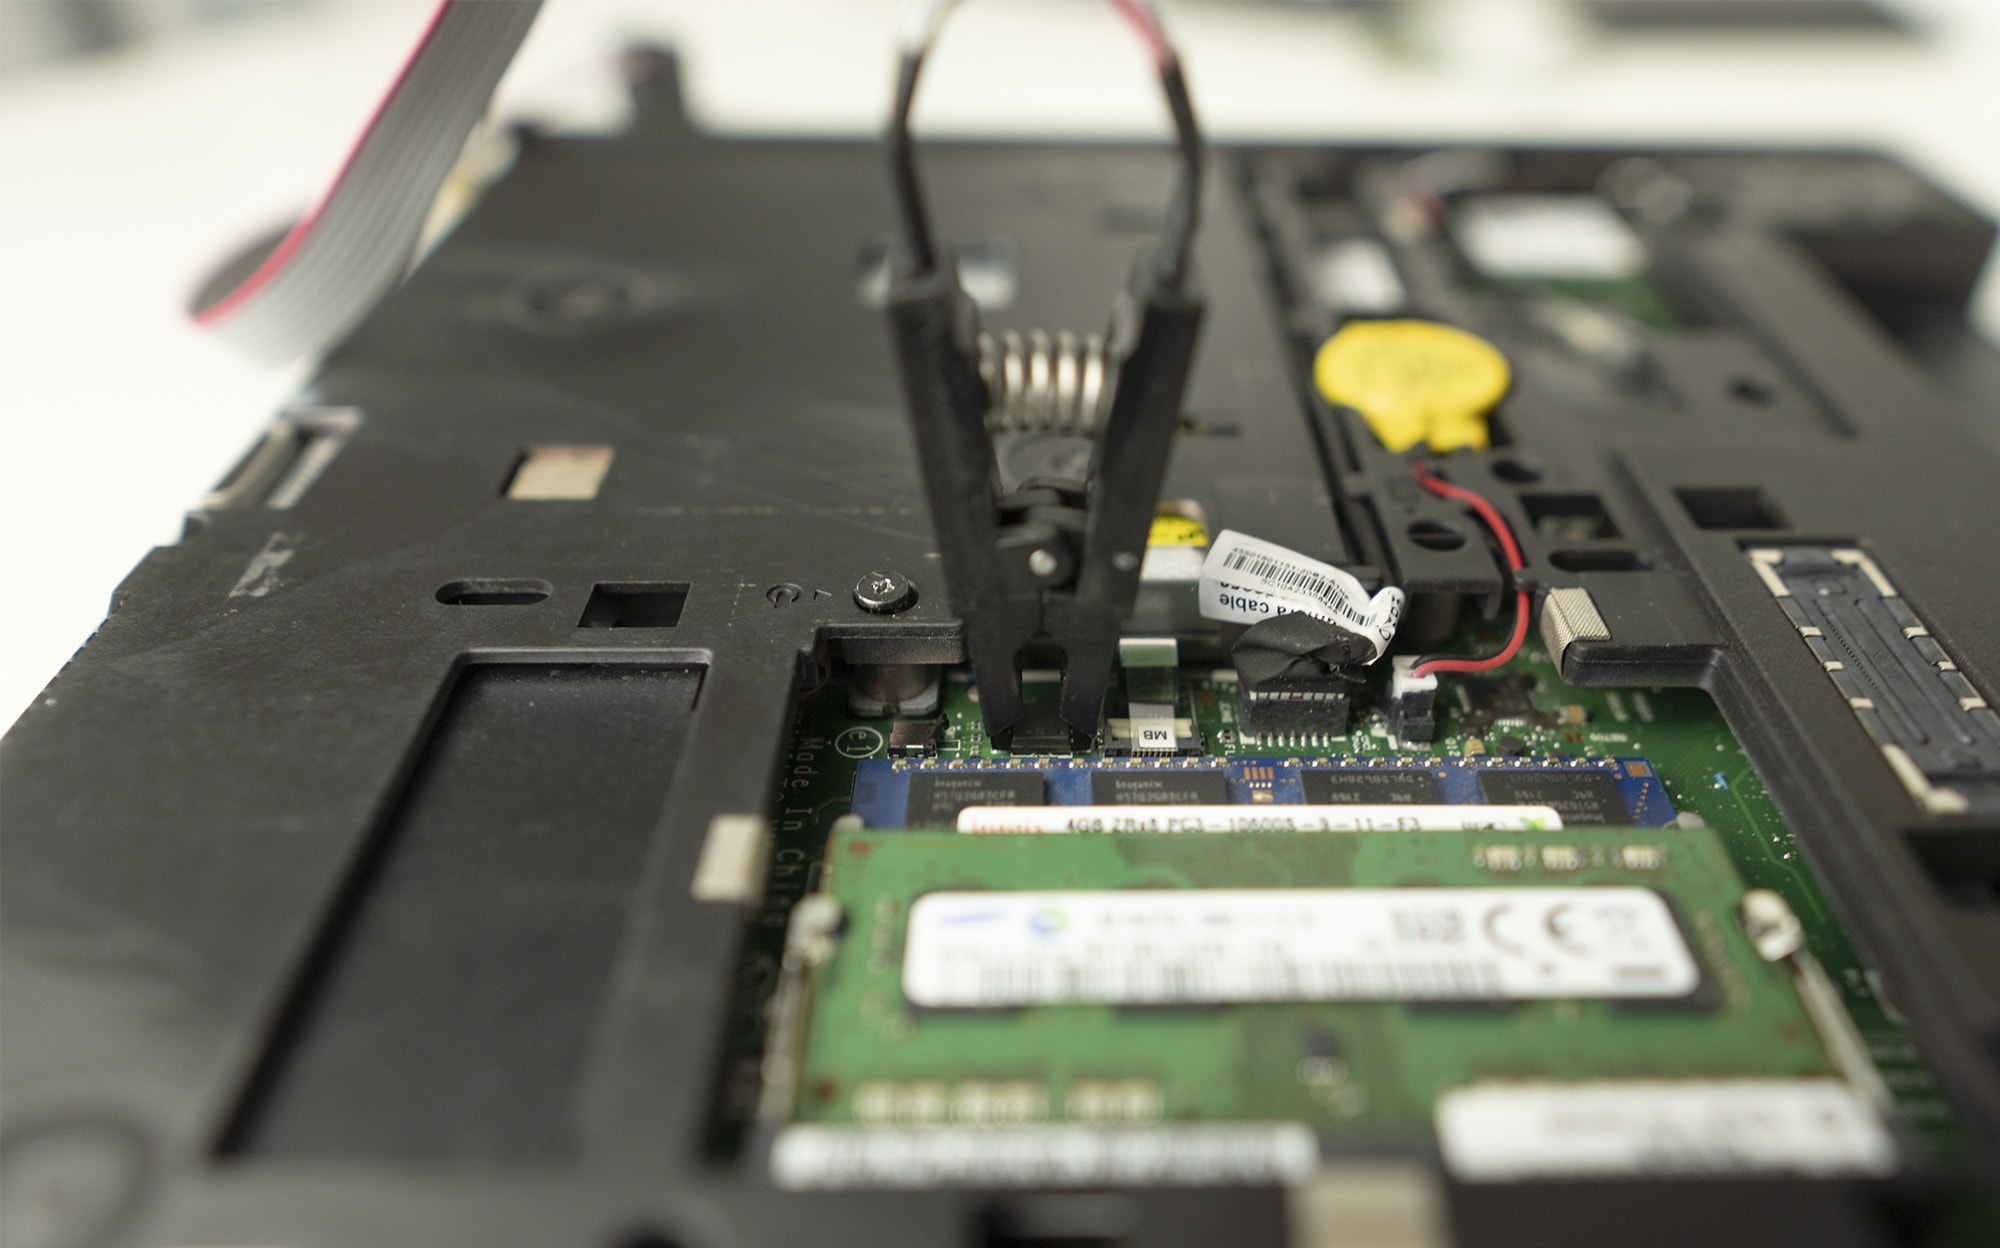
Next up we're going to plug the programmer into our second laptop and open a terminal. Go to UEFIPatch folder and type this command:
sudo flashrom -p ch341a_spi -r bios1.img
If you get a "No chip found" error, unplug the USB programmer from the laptop and try to re-seat the clip on the chip. Sometimes the connection isn't strong enough, and usually fiddling with the clip helps.
After flashrom has finished reading your chip, repeat the same command again, but this time replace the bios1 with bios2:
sudo flashrom -p ch341a_spi -r bios2.img
Next, we're going to compare the two BIOS dumps to make sure they're identical:
If this returns nothing, we're good to go. But if it says "Files are different", you need to unplug the USB programmer, re-seat the clip on the chip and try again.
After that's done, you can delete the second file since both are identical anyway. DO NOT delete the first file, keep it somewhere safe: this is going to be your backup in case something goes wrong.
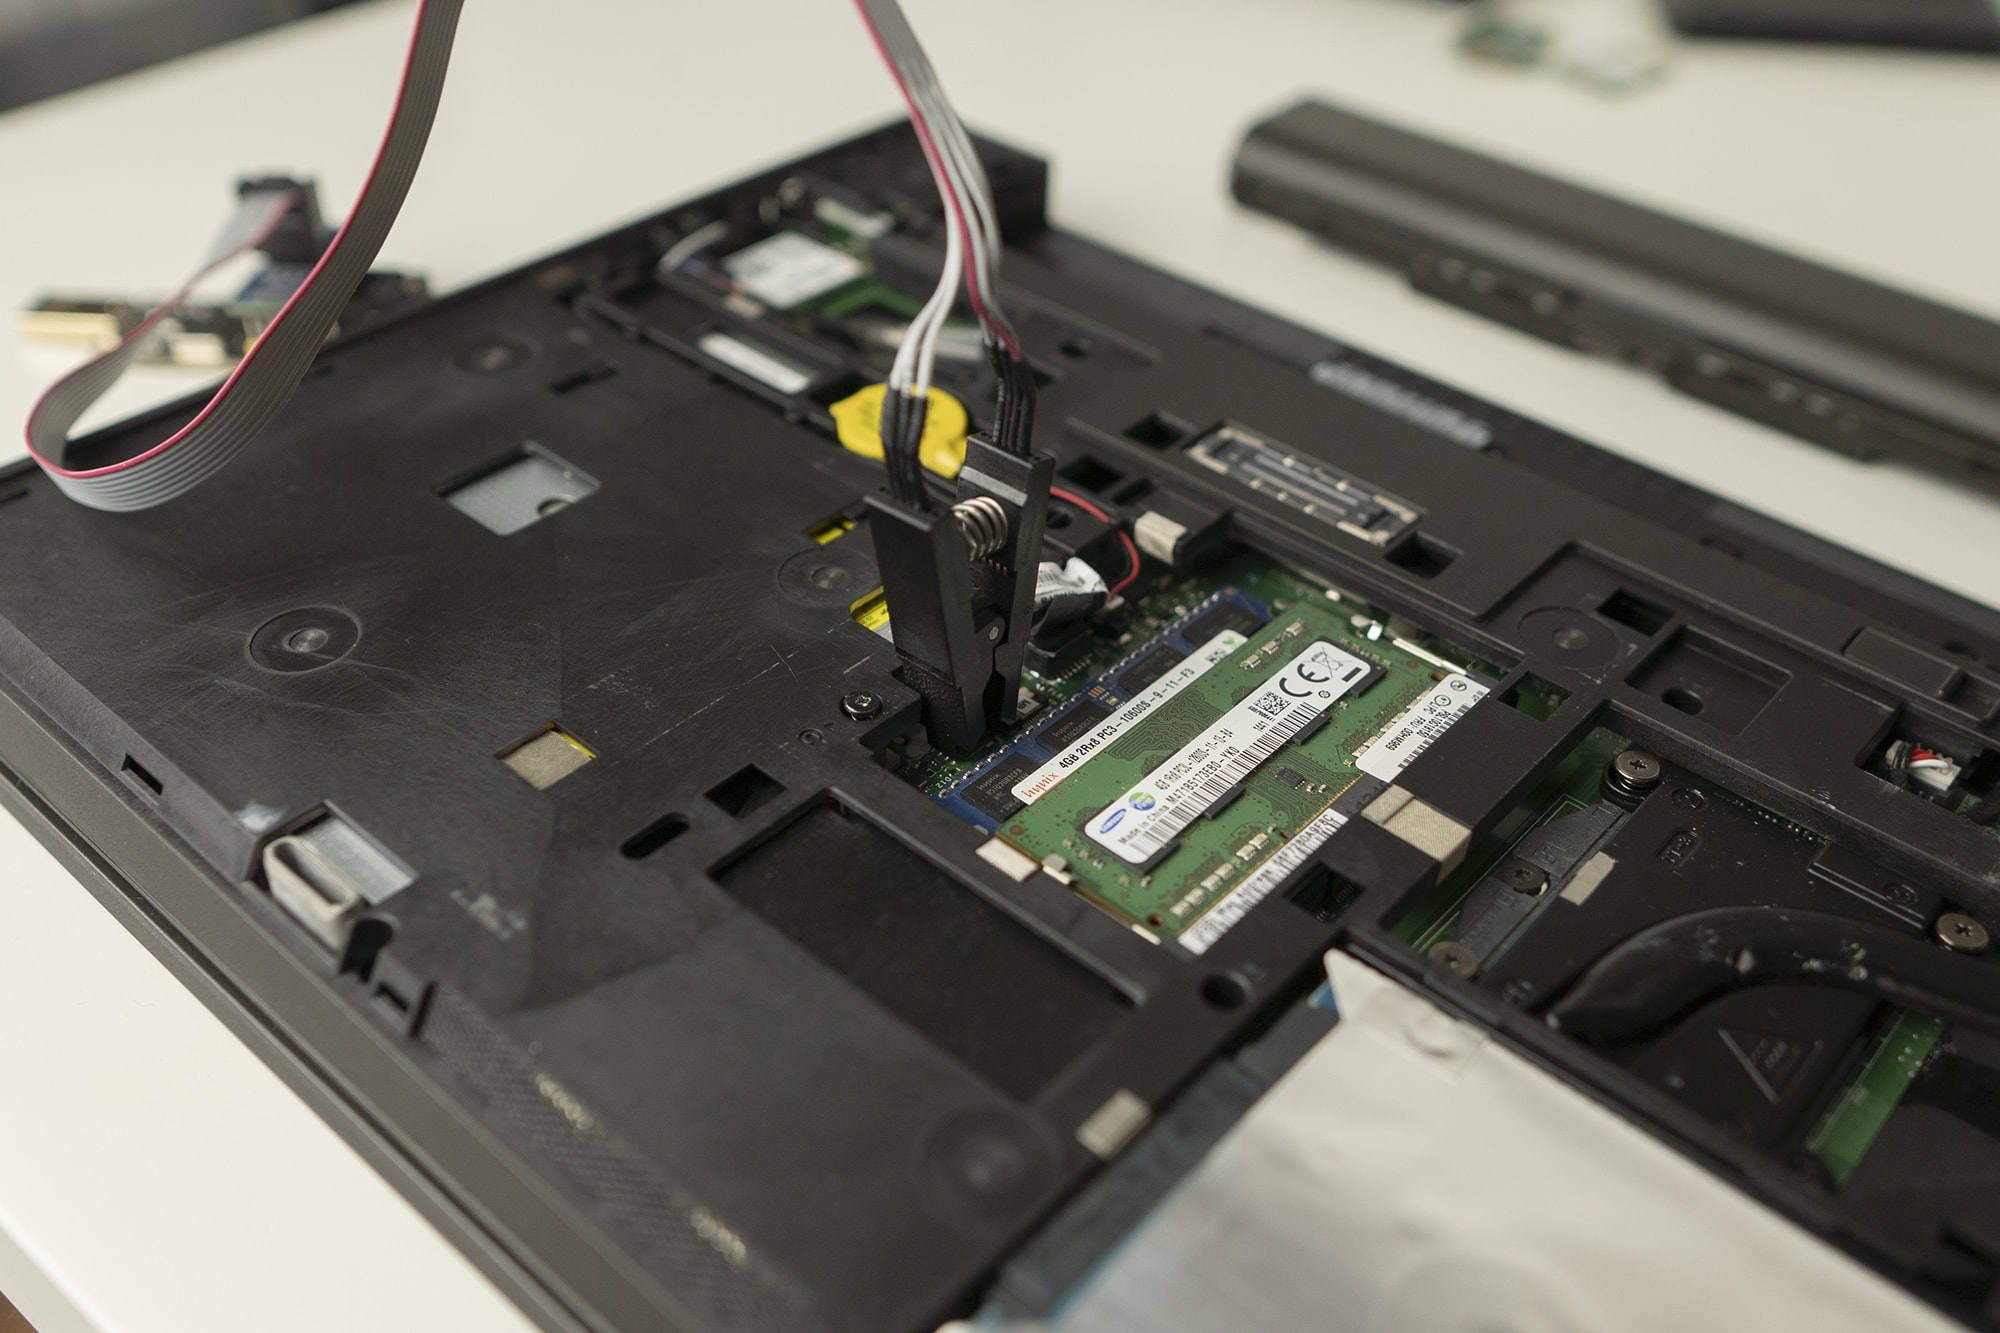
Now, unplug the USB programmer so that you don't accidentally yank the clip. You can also leave the clip on the chip, since we'll have to put in back in a minute anyway.
Patching the BIOS
Now we're going to patch the BIOS file and remove the Wi-Fi whitelist. Make sure you have UEFIPatch and the BIOS file in the same folder and type
At this point we're pretty much done, but if you try and flash this BIOS file back to the chip, you'll get a laptop that beeps 10 times every time you turn it on. This means that the BIOS is unsigned and somebody tampered with it [I wonder who that was]
To avoid that, we need to sign the BIOS file. But first, let's install python3 and the pycryptodome package. On Mac you can do it by typing
And on Linux you'll have to install Python3 using your distro's package manager.
After that, type
Next, go to the folder where you unpacked UEFIPatch and thinkpad-uefi-sign and type:
And there we go, "image signed". We can also verify the image by typing:
As you can see, it says "Signatures correct"
Now it's time to flash the modded BIOS back to the laptop.
Flash the BIOS
Re-connect the USB programmer to your second laptop and in case you removed the clip from the BIOS chip, put it on again.
The command we need to type now is
Wait for it to finish, unplug the USB programmer and remove the clip.
IMPORTANT: Unplug the USB programmer FIRST, and THEN remove the clip. You might damage your laptop otherwise.
Put the lid back on the laptop, slide in the battery and turn the laptop on.
Verify that the laptop boots to the OS and connects to Wi-Fi networks.
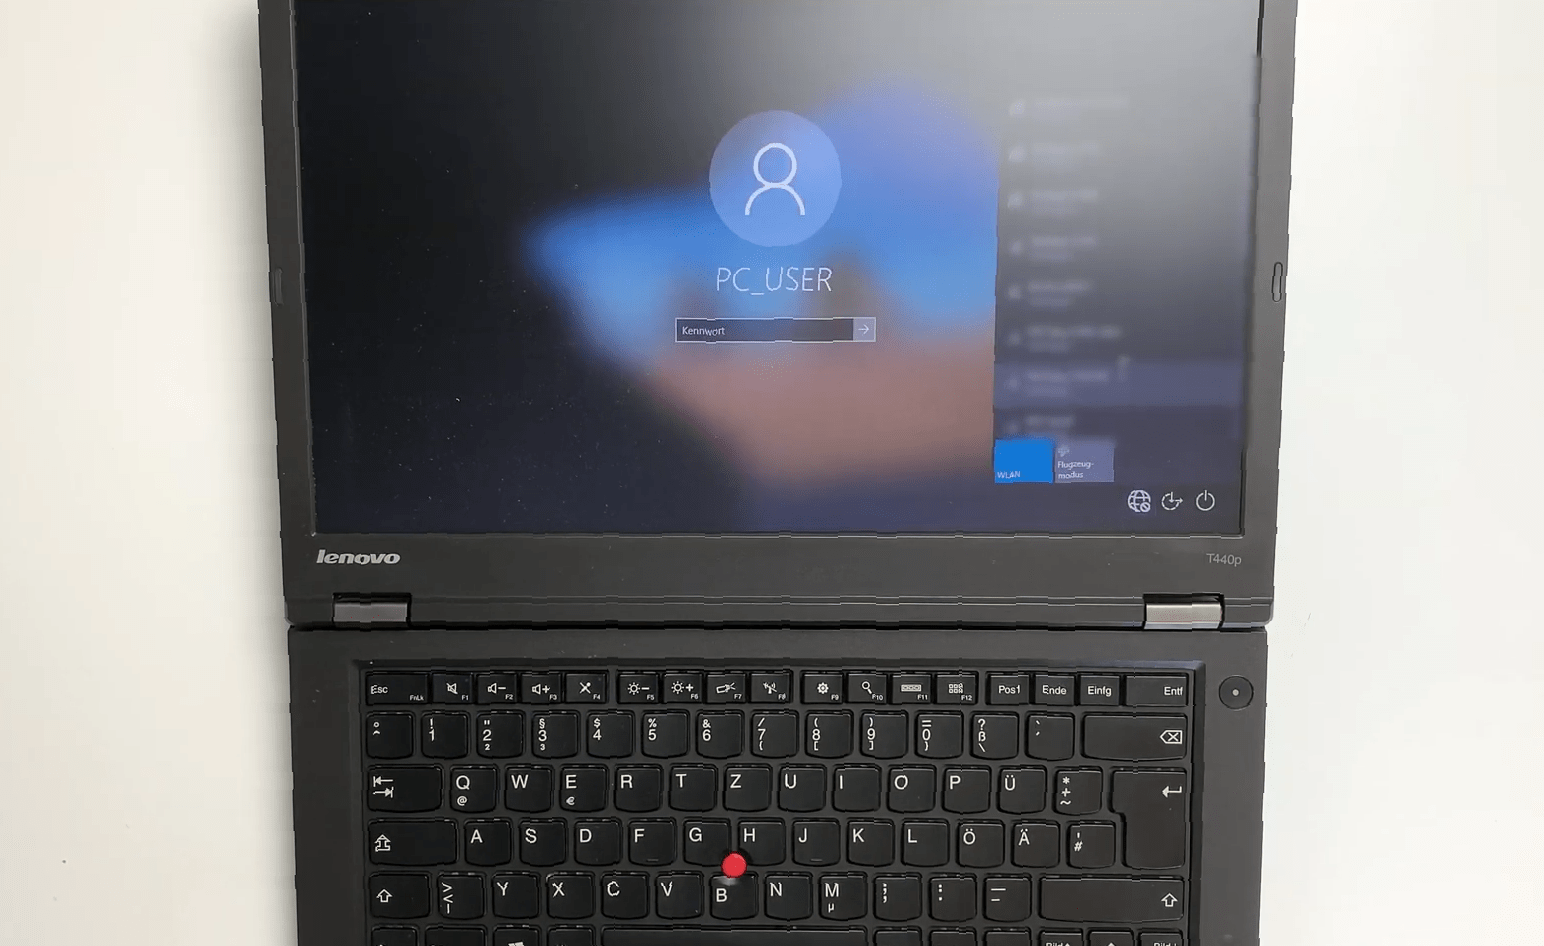
Congratulations! Your laptop is now free... as in connecting to all the Wi-Fi networks, I guess.
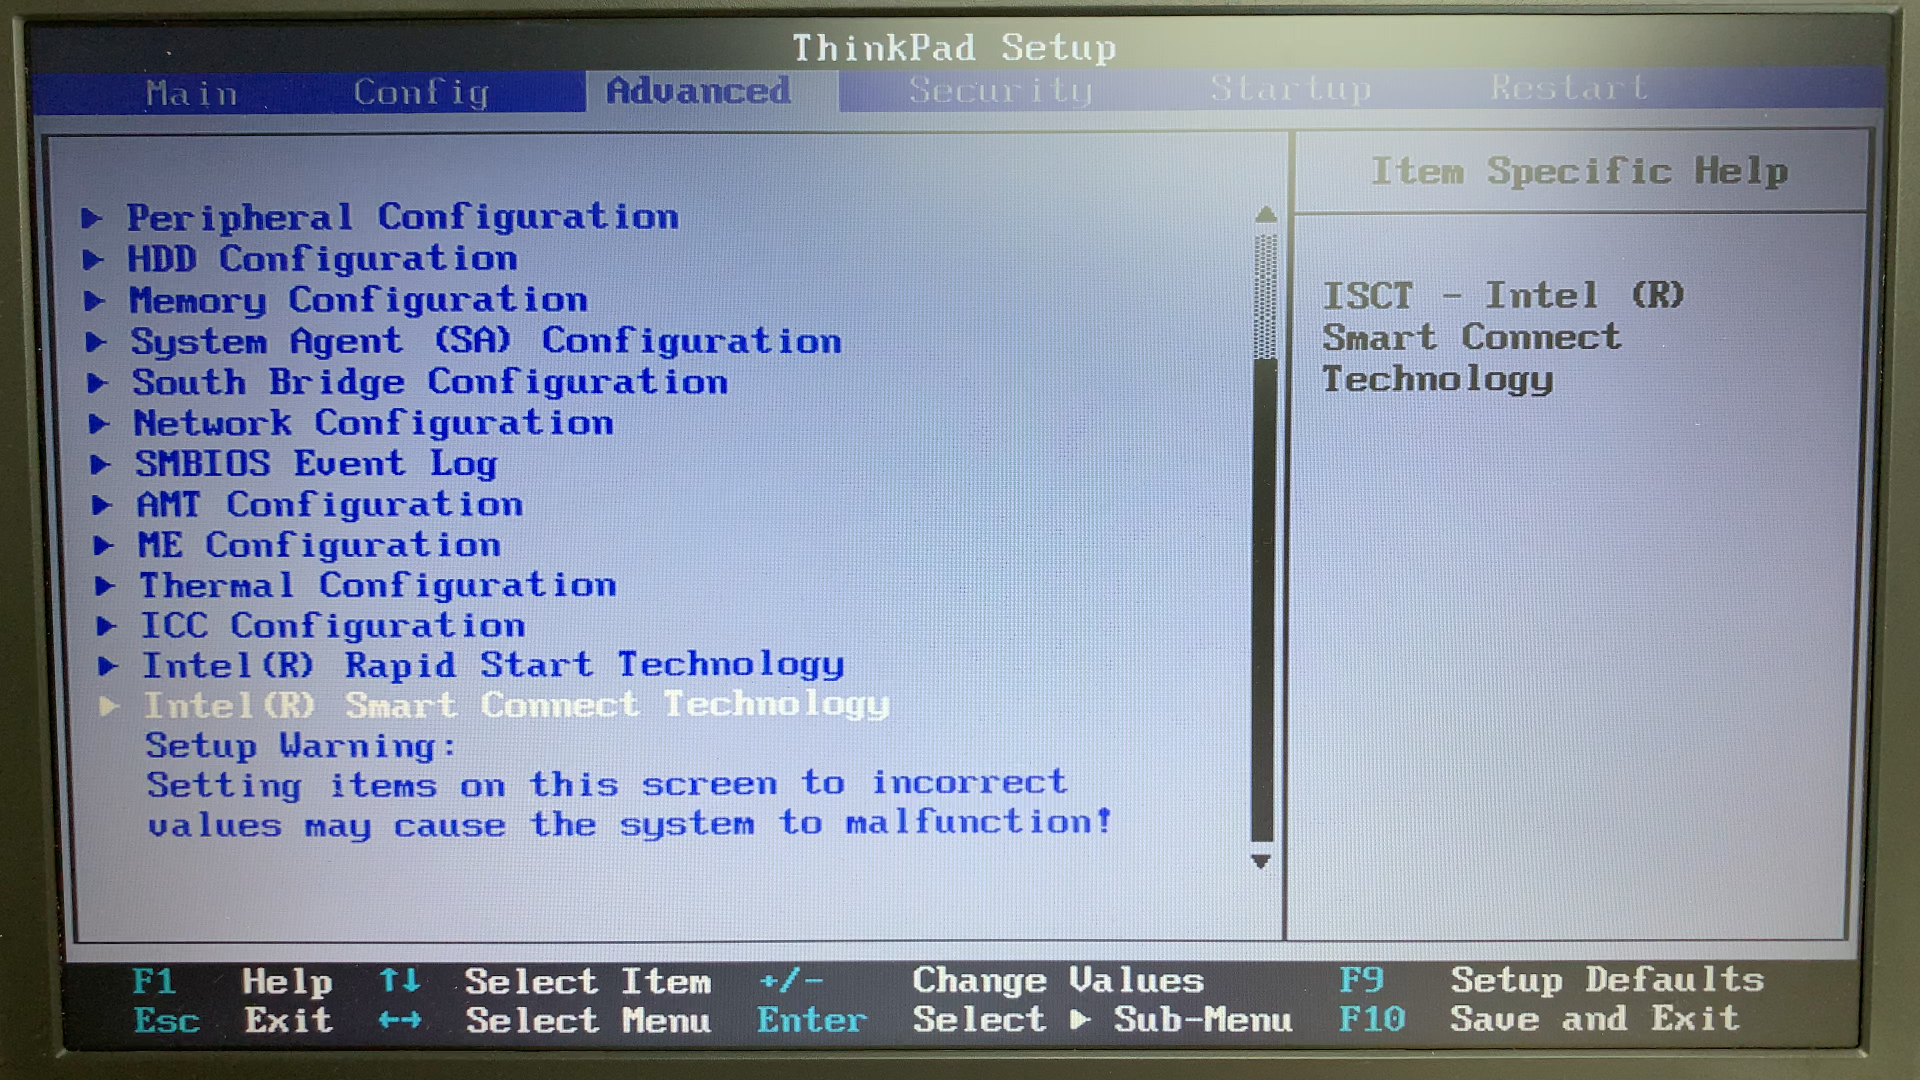
If you take a look at the BIOS menu, you'll also see a bunch of new settings such as power limits, ACPI states and so on. Have fun!
Special thanks
- Thrimbor https://github.com/thrimbor
- tonymacx86 https://www.tonymacx86.com/
- XX and paranoidbashthot for developing the BootGuard bypass method and patches for xx40 onwards https://github.com/digmorepaka/thinkpad-firmware-patches/